Collection Entry
Step 1: Collection Entry
After selecting the sale for which collection will be made, click the "Payment Entry" button in the Payment Detail Belonging to the Sale area.
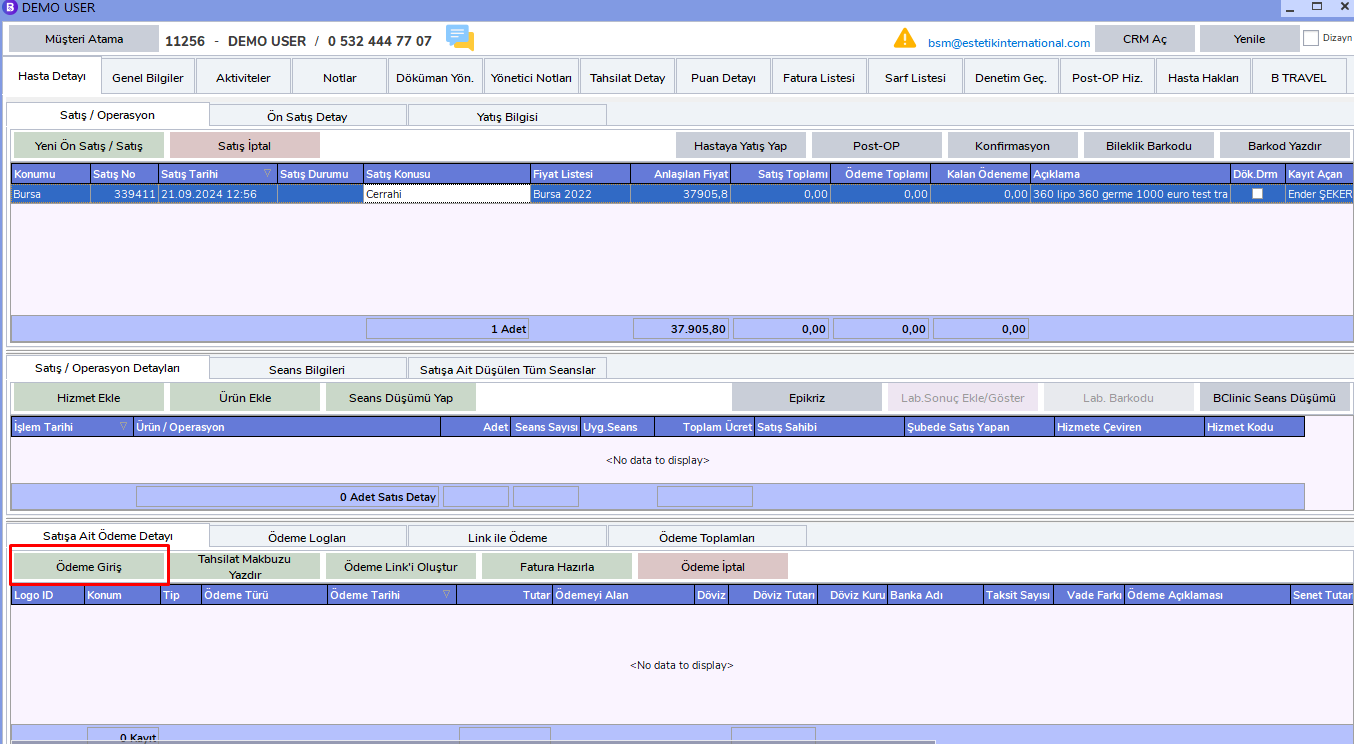
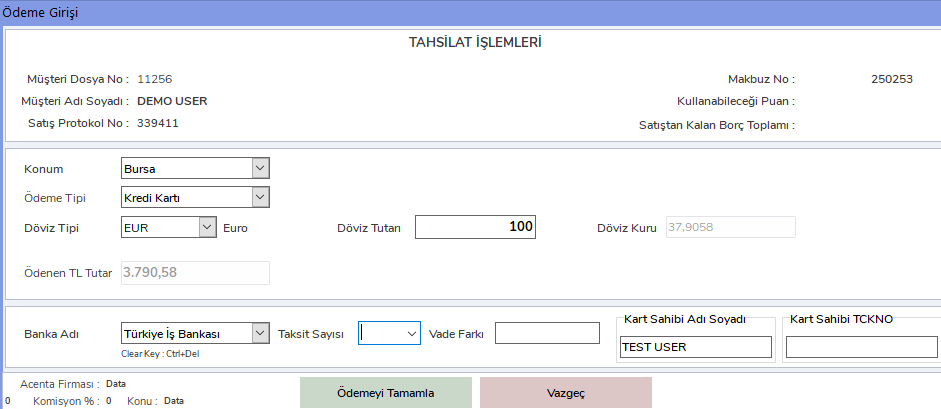
The Collection Entry Screen will open. Please fill in the following fields completely:
- Location
- Payment Type
- Currency Type
- Currency Amount
- Bank Name
- Card Holder
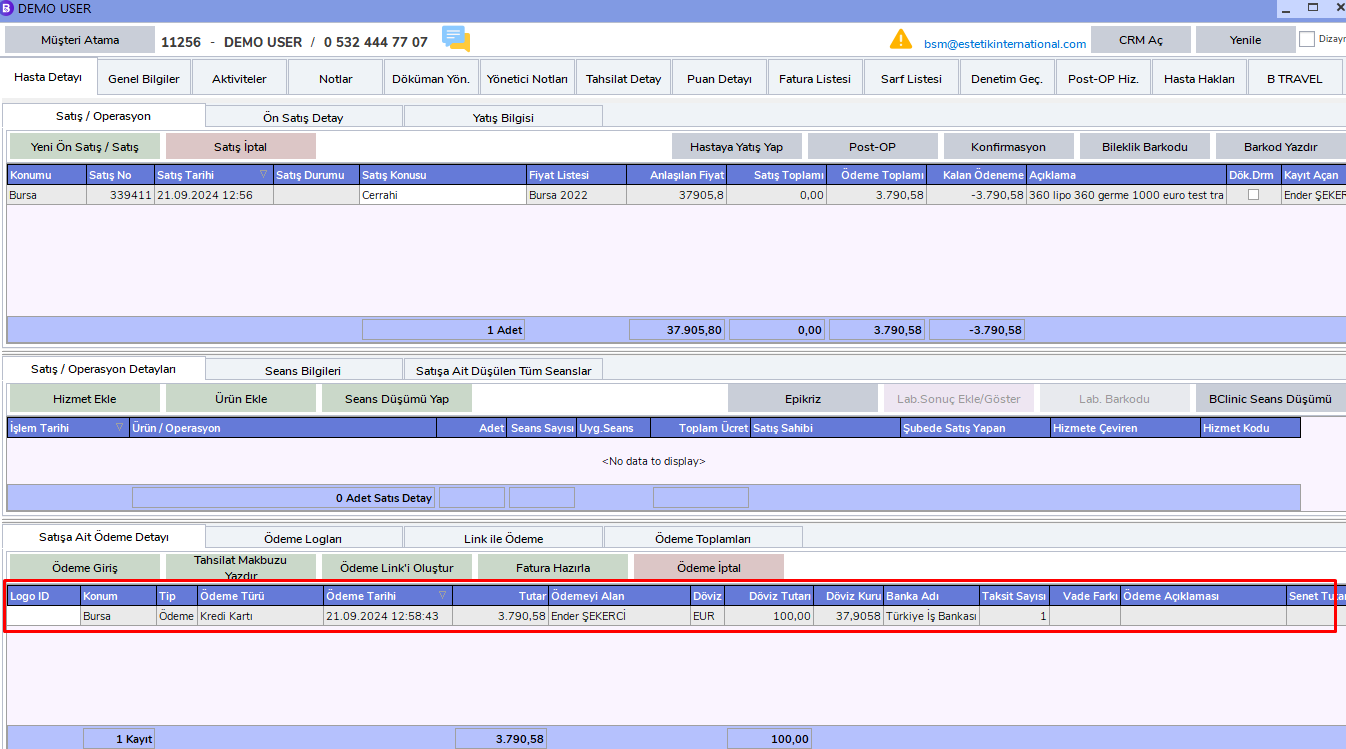
You can save the collection entry by clicking the Complete Payment button. To check the entered collection, select the related sale and check it from the Payment Detail Belonging to the Sale area.
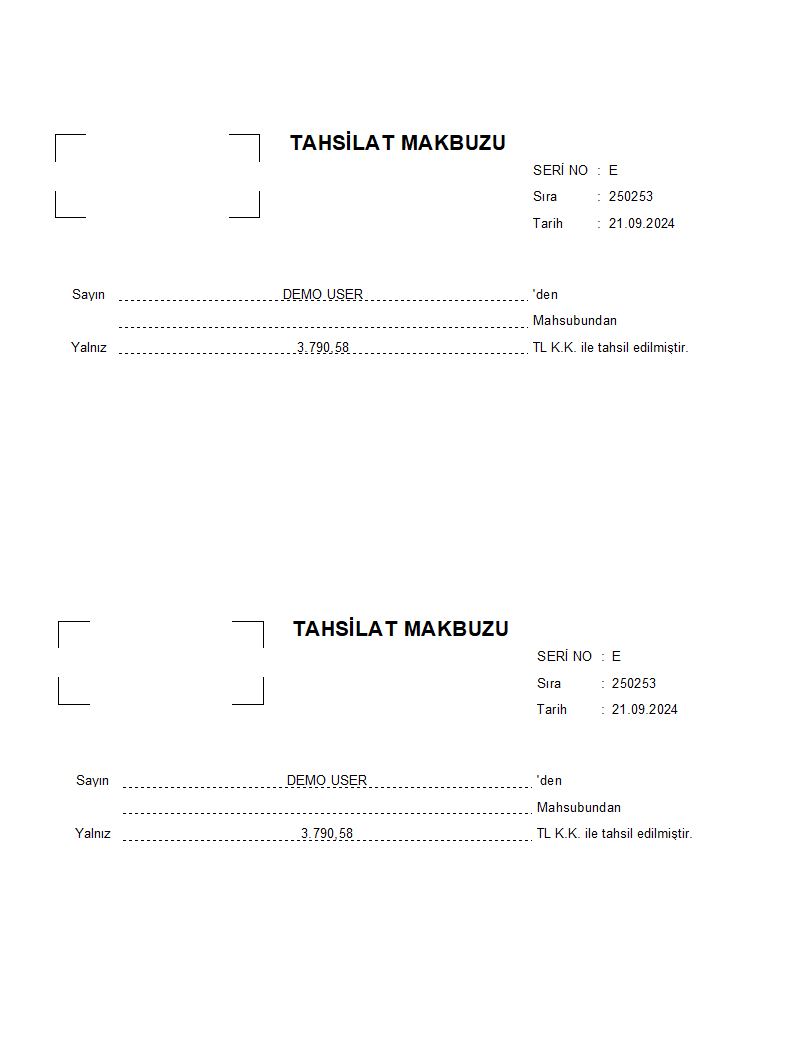
Note: If the patient requests a collection receipt
Click the Print Collection Receipt button.
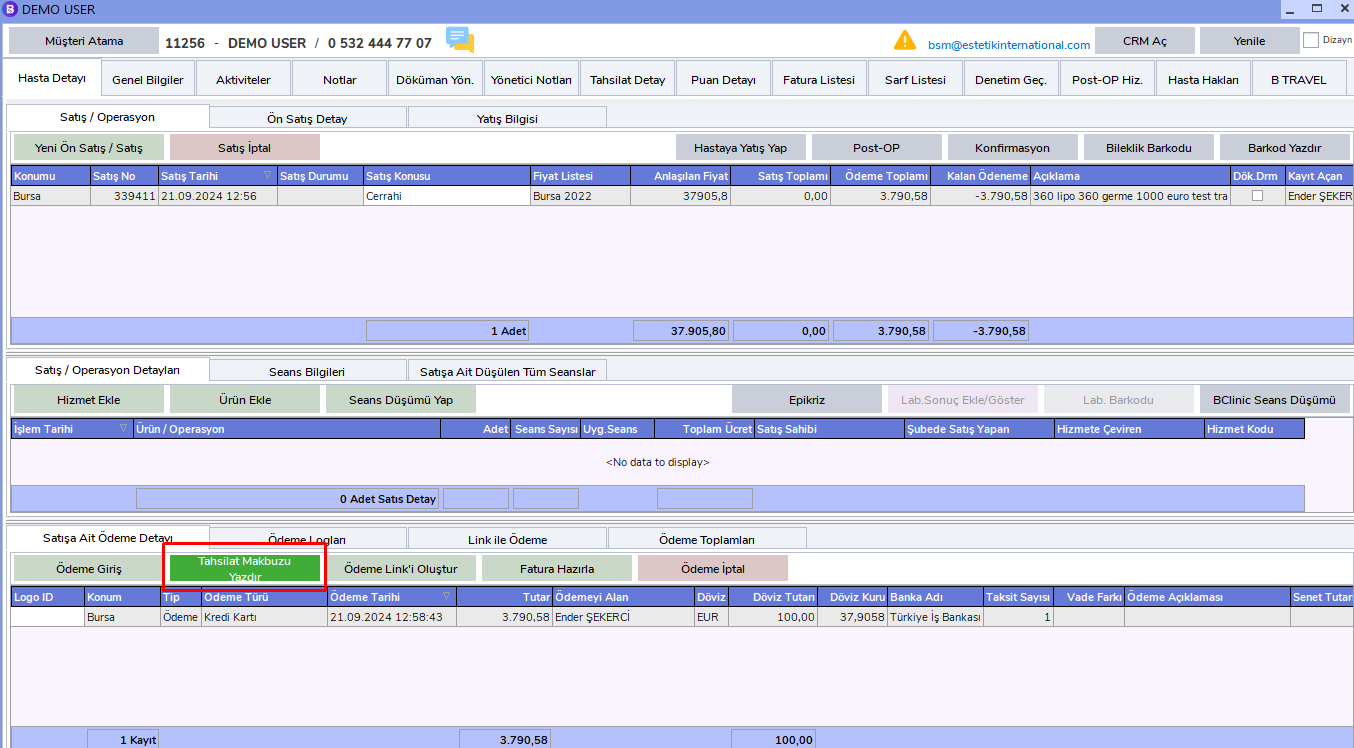
You can give one copy of the receipt to the patient and keep the other copy.
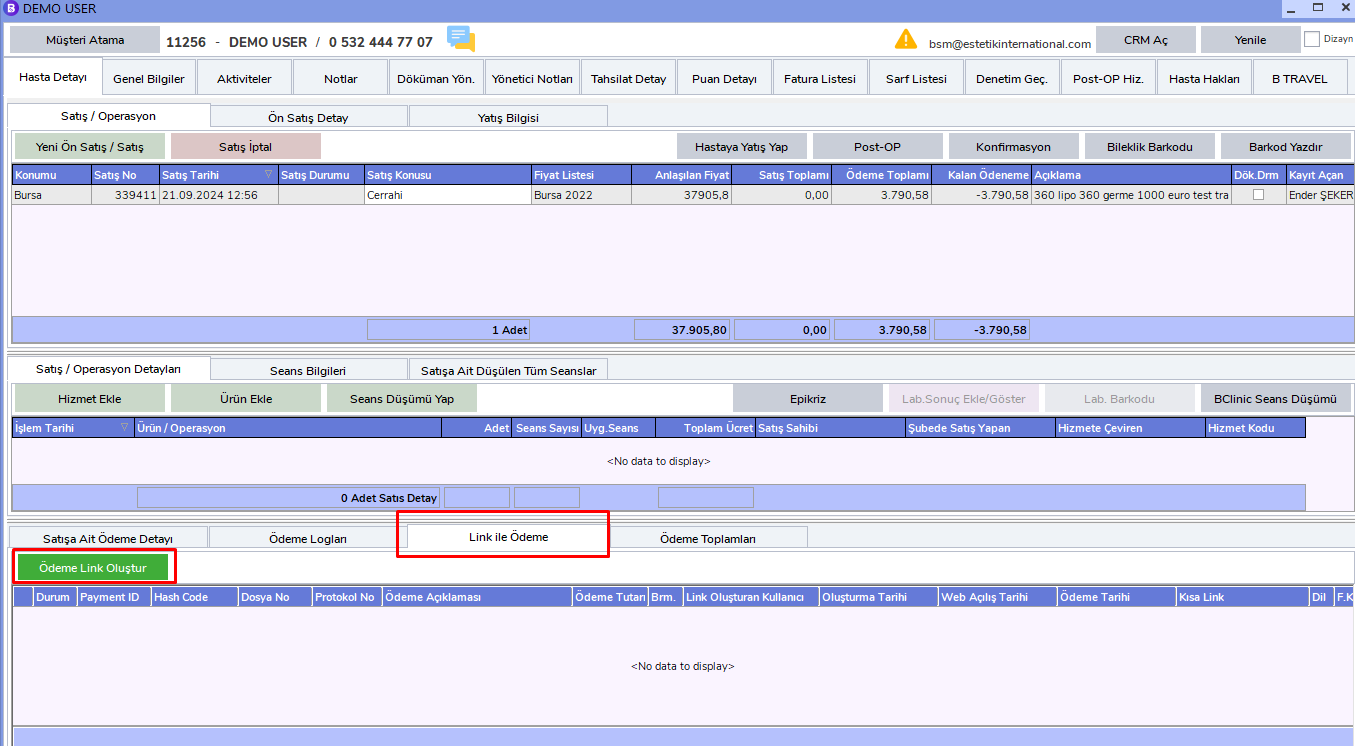
If payment by link is requested:
Click the Create Payment Link button under the Payment by Link tab.
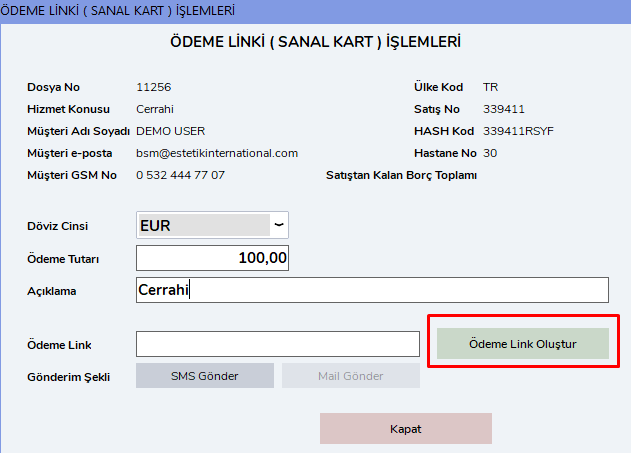
Fill in the Currency Type, Payment Amount, and Description fields completely, then click the Create Payment Link button. You can send the created link by SMS or e-mail.
Important Notes
Sales Operations
By default, the most recent sale is automatically selected. However, during all operations, whichever sale will be processed must be selected carefully from the related sale's "Sales/Operation" area.