Application Screens
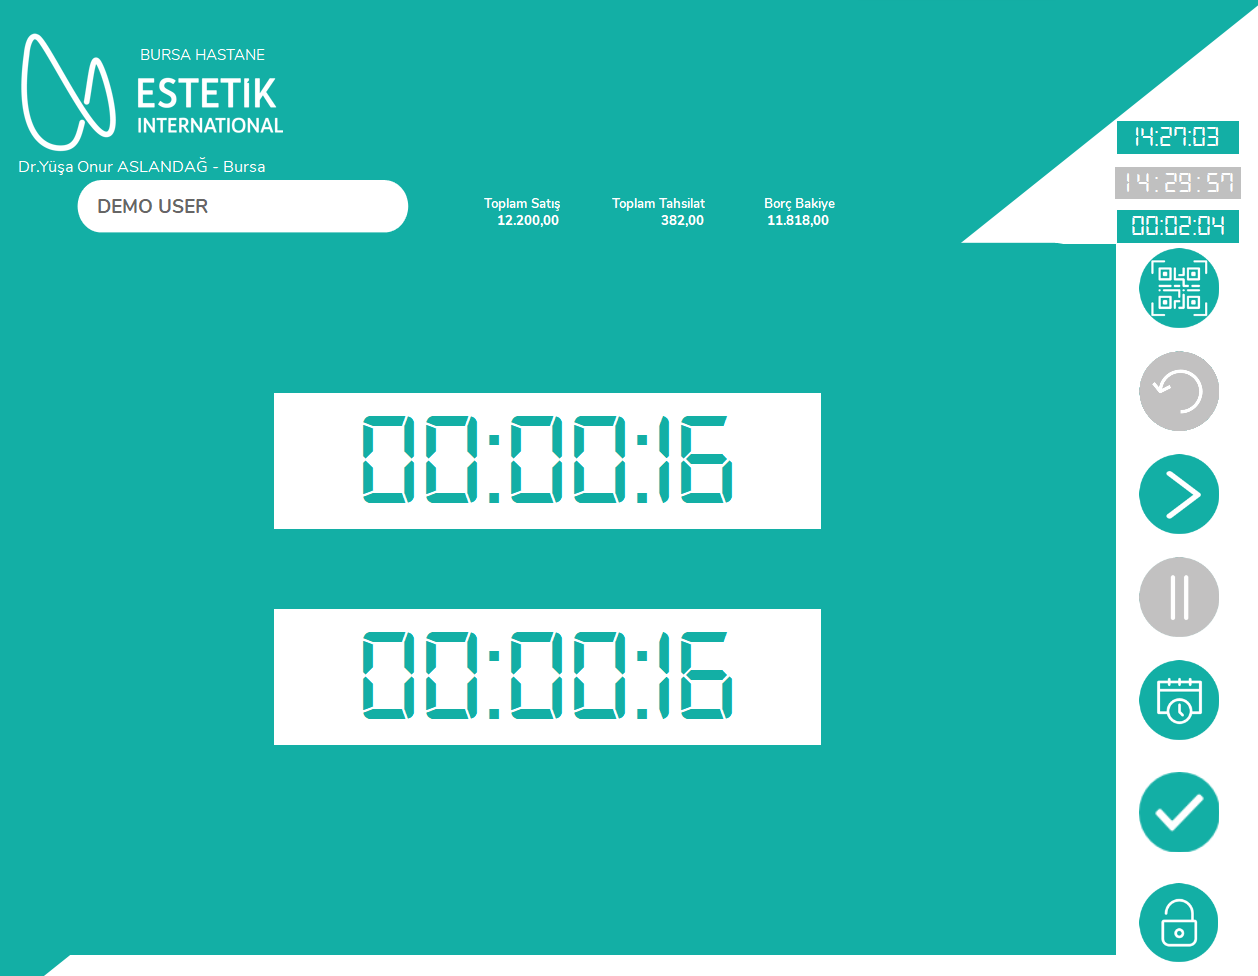
7. Common structure of the main application screen
When a service is selected, the system automatically opens the suitable page according to service type.
7.1. Common screen information
- Branch name
- Logged-in practitioner
- Patient name
- Total sales
- Total collection
- Debt balance
- Application start time
- Elapsed application time
- Session indicators of the selected service
- Door lock
- Consumable material icon; visible if stock issue by barcode setting is enabled
- Play/resume icon
- Hold/pause icon
- Past sessions icon
- Complete application icon
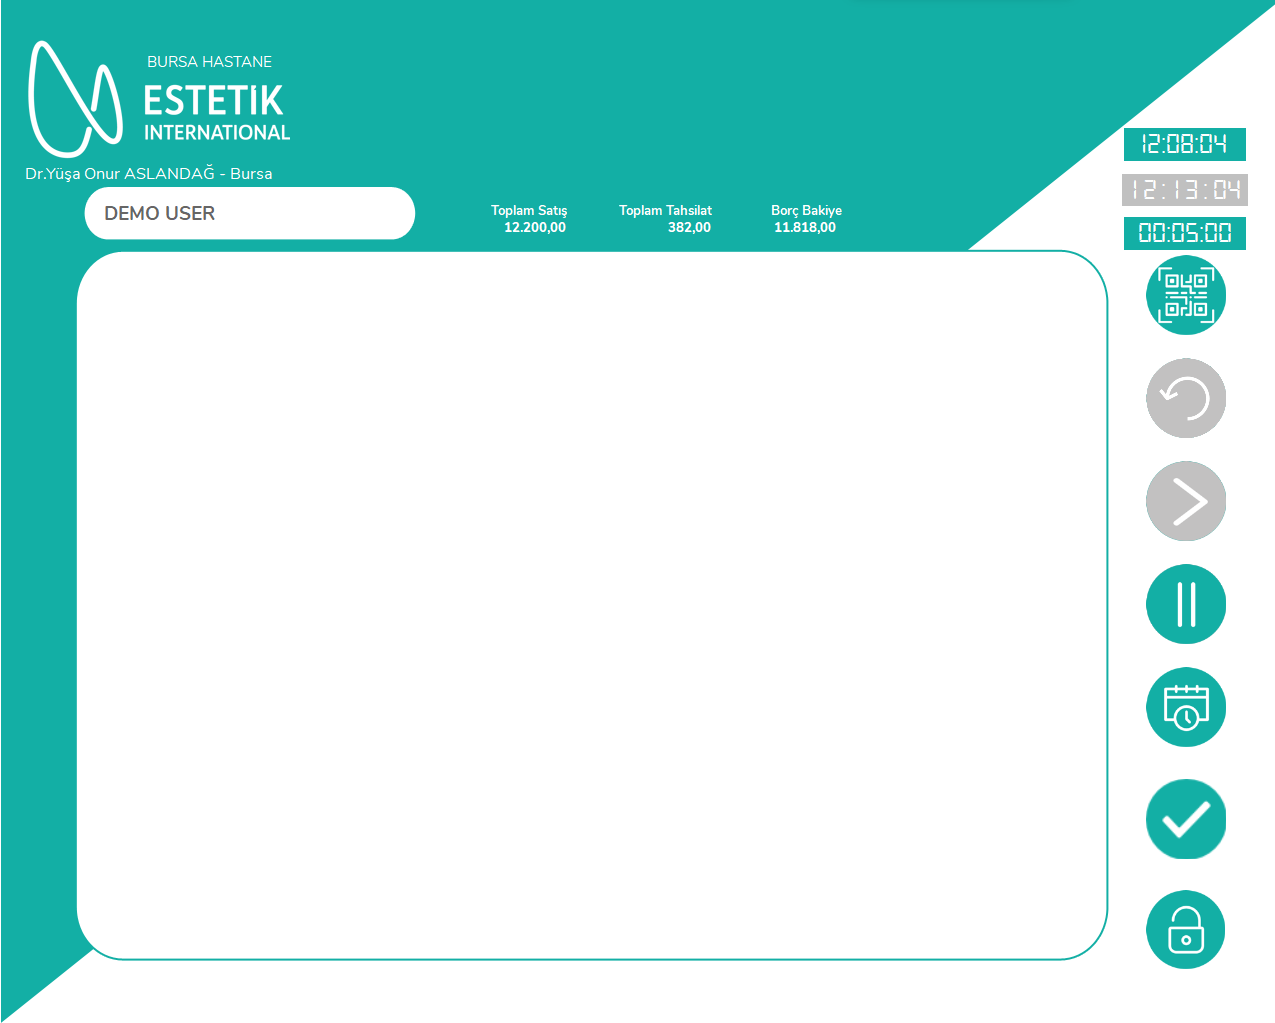
7.2. Starting the application duration
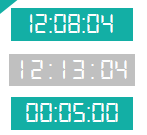
When the screen opens, the application counter starts automatically.
The system also tries to find the patient's kiosk/appointment notification time. If a kiosk record exists:
- Kiosk time is used in waiting time calculation.
- The related time may be shown on the application start screen.
If no kiosk record is found, the current time is used.
7.3. Automatic selection of the service page
The system selects the page according to the following information:
- Service group
- Product/special code of the service
- Patient gender
- Whether the service is full body, package or fixed service
Under normal conditions, the user does not select the tab manually.
7.4. General rule of service and area selection
An area/service is visible and selectable only if it exists in the patient's open session records.
When an area is selected, the "Application Completion Information" window opens. The main session should not be completed before this window is saved.
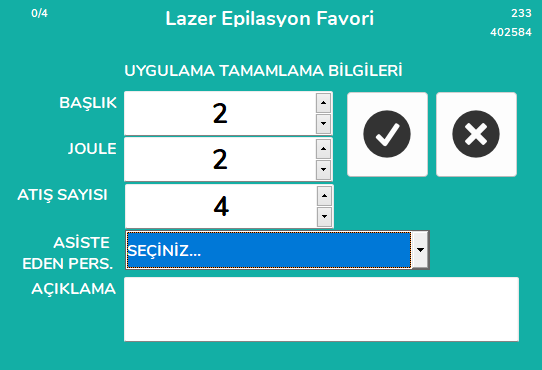
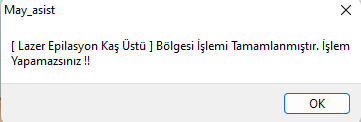
When the record is completed, the related area turns red. If the same area is touched again:

[Service/Area Name] Area Operation Has Been Completed. You Cannot Perform Operation!!
message opens.
8. Laser epilation screens
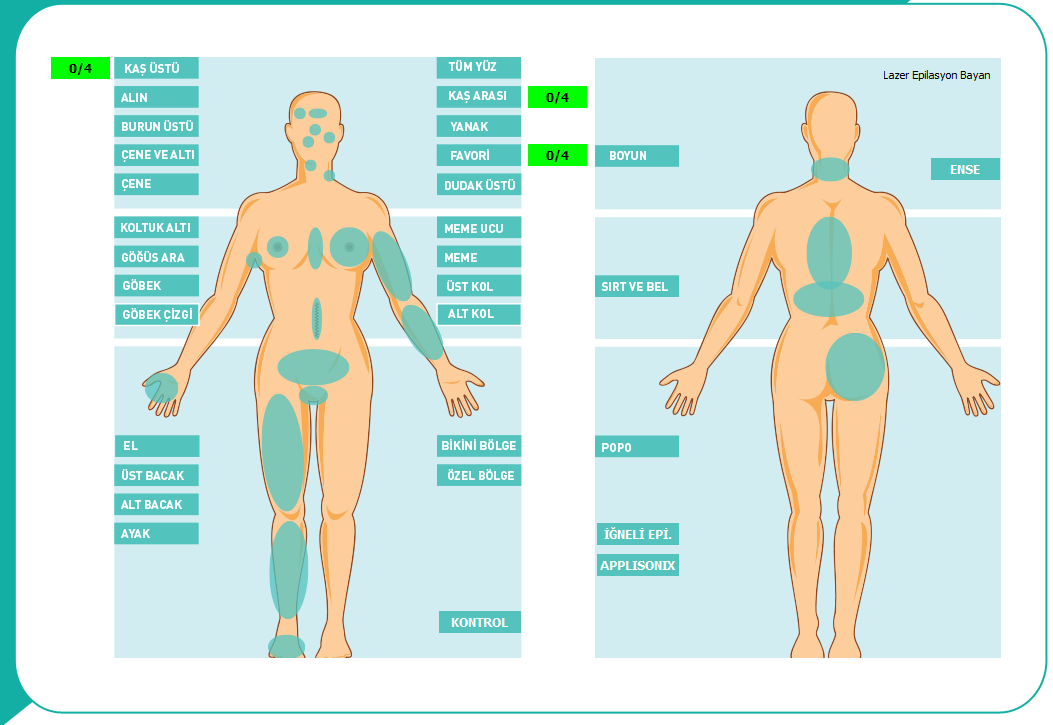
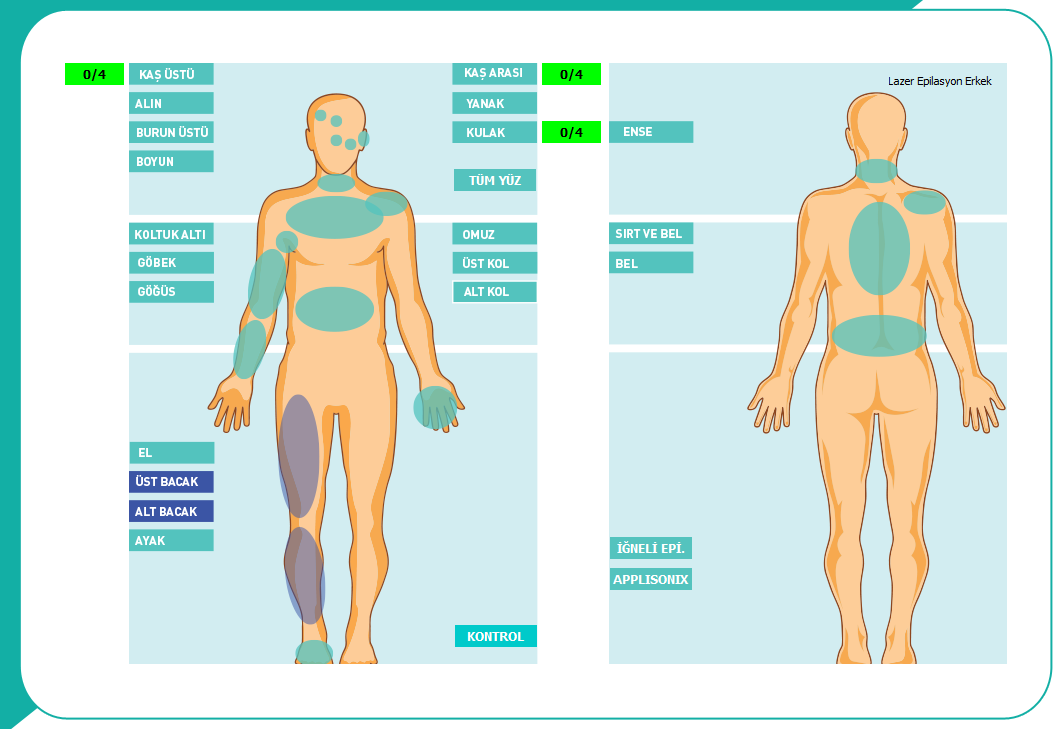
Laser screens show different area maps according to patient gender and service package.
8.1. Laser area selection and recording steps
- Touch the area shown in green on the screen.
- The "Application Completion Information" window opens.
- The selected service/area name and session status come automatically.
-
Fill in the required fields:
-
Head
- Joule
- Shot count
- Description
-
Assisting personnel
-
Tap the OK button.
- The window closes.
- The related area becomes red.
- If another area will be applied in the same session, select the new area and repeat the operation.
8.2. Application Completion Information window
The window contains these fields:
- Service/Application Name: Comes automatically.
- Session Status: Comes automatically in
applied/totalformat. - Head: Device head or head information used in the application.
- Joule: Application energy value.
- Shot Count: Total shots made in the application.
- Description: Free text.
- Assisting Personnel: Can be selected from the list.
- OK: Creates the temporary session record.
- Cancel: Closes the window and clears entered values.
When the Head, Joule and shot count fields are touched, the numeric keyboard opens. In the description field, the text keyboard opens.
8.3. Laser Epilation Female page
Suitable areas from the following may be shown according to the services purchased by the patient:
8.4. Laser Epilation Male page
Suitable areas from the following may be shown according to the services purchased by the patient:
8.5. If the session limit is exceeded
If the applied session count in a service is equal to or greater than the total session count, a record cannot be made.
The system shows this message:
Total Session Cannot Be Greater Than Applied Session!!
The user should:
- Check that the correct service is selected,
- Have it checked whether a new session right has been defined for the patient,
- Not re-enter a completed area.
9. Botox screen
When the Botox service is selected, the system automatically opens the Botox page.
9.1. Botox operation areas
The screen contains the following checkboxes:
- Forehead lines
- Eyebrow lifting
- Glabellar lines
- Crow's feet around the eyes
- Bunny lines around the nose
- Lip lines
- Chin muscle
- Smile lines
- Chin dimple
- Neck bands
- Armpit
- Hand
- Foot
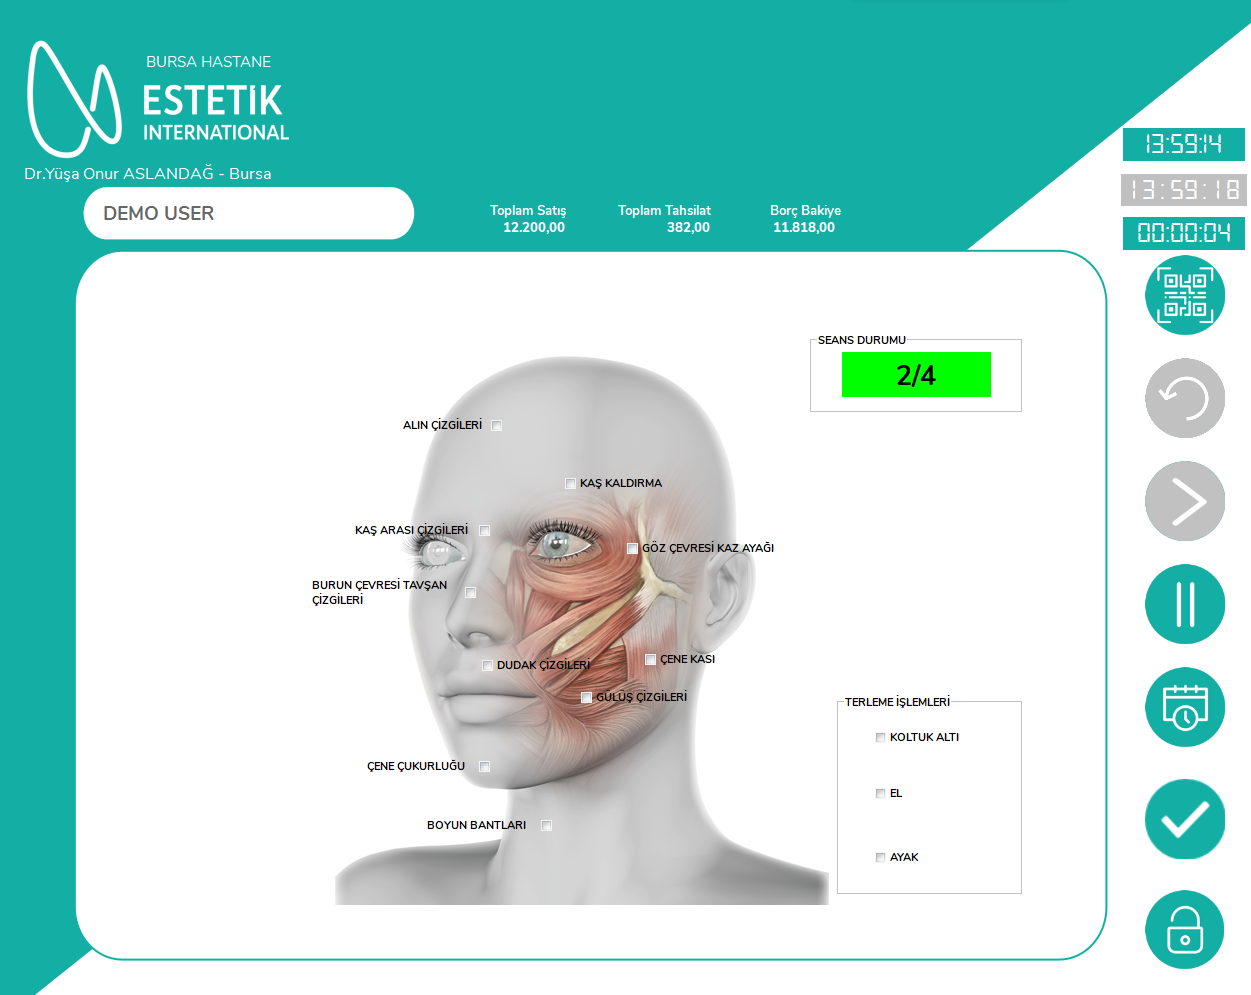
9.2. Botox record
- Mark all applied areas.
- The selected areas accumulate in the operation list on the screen separated by semicolons.
- Touch the session status indicator.
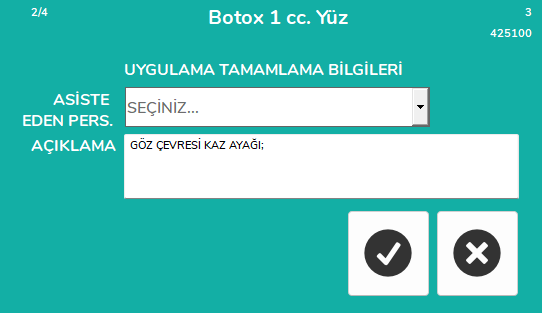
- The "Application Completion Information" window opens.
- The selected areas are written automatically in the description field.
- Edit the description if necessary.
- Select assisting personnel if necessary.
- Tap the OK button.
After recording:
- The session indicator becomes red.
- Checkboxes are cleared.
- The same Botox service cannot be recorded a second time.
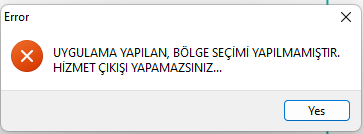
9.3. If recording is attempted without selecting an area
If session status is selected without marking any Botox area, the following error is shown:
At least one operation area must be selected first.
9.4. If the completed Botox service is touched again
The system reports that the related service has been completed and no new operation can be performed.
10. Filling screen
When the Filling service is selected, the system automatically opens the Filling page.
10.1. Filling operation areas
The screen contains these checkboxes:
- Eyebrow edge lifting
- Cheek volumizing
- Nasolabial fold
- Lip shaping
- Lower chin edge groove
- Chin
- Temple area filling
- Nose shaping
- Peri-oral lines
- Lip corners
- Marionette lines
- Jawline
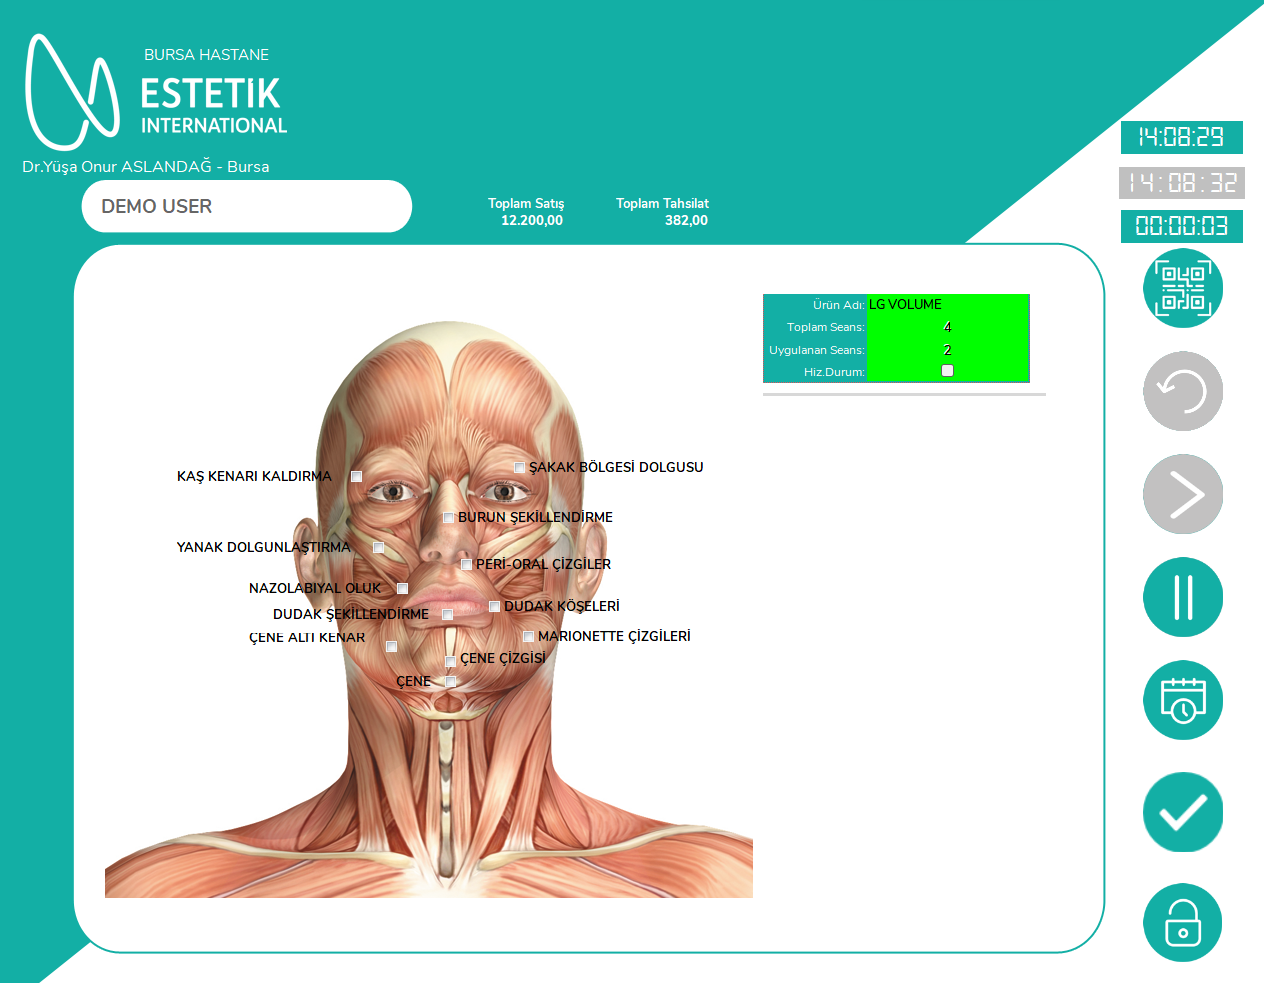
10.2. Filling service cards
On the Filling page, the patient's open filling product/service records are shown as cards.
Cards may include:
- Product/service name
- Total session
- Applied session
- Service status
- Sales date
Available services appear green, and services for which operation entry has been made in this session appear light gray.
10.3. Filling record
- Mark the applied areas.
- Check that the selected areas are created in the operation list.
- Touch the used filling product/service card.
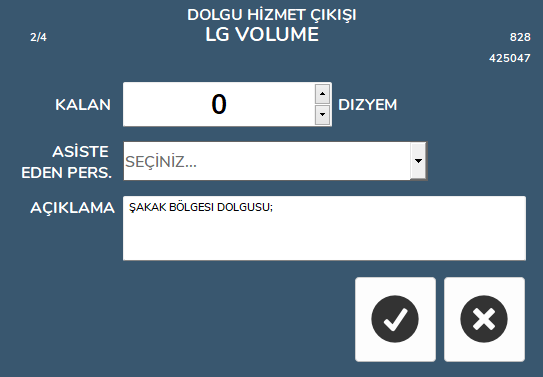
- The "Filling Service Issue" window opens.
-
Check or fill in the following information:
-
Service name
- Session status
- Description; selected areas come automatically
- Assisting personnel
-
Remaining quantity
-
Tap the OK button.
After recording:
- Checkboxes are cleared.
- The filling card becomes processed.
- The card list becomes active again.
Remaining quantity field
The "Remaining" field in the filling window is saved together with the unit information defined on the screen. In the current design, the unit label appears as "DIZYEM".
When the field is touched to enter a value, the numeric keyboard opens.
10.4. If the filling card is touched without selecting an area
The following error is shown:
At least one filling area must be marked first.
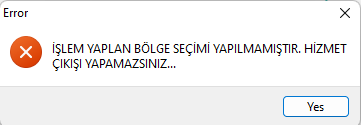
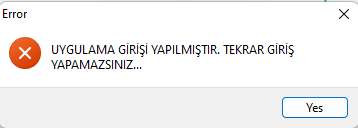
10.5. If the same filling service is entered again
The following error is shown:
10.6. If filling record fails
The error window shows:
- Practitioner
- Patient name
- Service name
- Information that service issue could not be performed
The card list is activated again. Information should be checked and the operation should be tried again.
11. Other services screen
If the service group is not laser, Botox or Filling, the "Other Services" card screen opens.
11.1. Information on cards
- Product/service code
- Product/service name
- Total session
- Applied session
- Sales date
- Service status
11.2. Service record
- Touch the applied service card.
- The "Application Completion Information" window opens.
- Service name and session information come automatically.
- Enter a description.
- Select assisting personnel if necessary.
- Tap the OK button.
The completed card appears light gray.
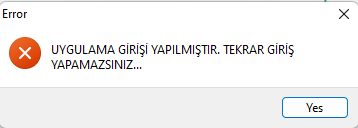
11.3. If the same service is touched again
The following error opens:
11.4. Cancel button
When Cancel is selected:
- The description is cleared.
- Assisting personnel selection is cleared.
- The temporary window closes.
- No record is created for the service.

12. Pausing and resuming the application
12.1. Pause operation
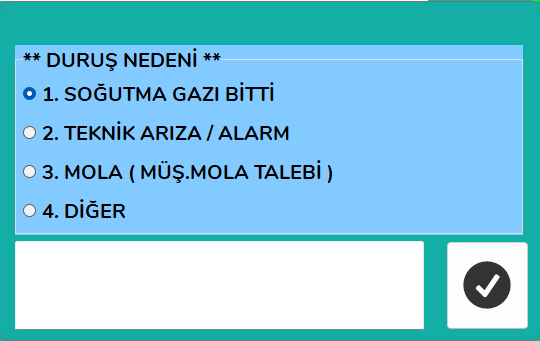
When the hold/pause icon is tapped, the pause window opens.
The window includes:
- "Pause Reason" options
- Description field
- Confirmation button

12.2. Pause reasons
The user can select one of these reasons:
- Cooling gas finished
- Technical fault/alarm
- Break - customer break request
- Other
When the window opens, the first reason is selected by default. The user should select the actual reason.
12.3. Description
Writing a description is especially important for the "Other" option. Details of the event may also be written for other options.
When the description field is touched, the on-screen keyboard opens.
12.4. Starting the pause
When the confirmation button is tapped:
- Pause start is recorded.
- The main application counter stops.
- The pause counter starts.
- Pause duration is shown on the screen.
- Operation areas on the application screen appear again, but session duration does not progress.
12.5. Resuming the application
When the play/resume icon is tapped:
- Pause end time is recorded.
- Pause duration is calculated.
- The pause counter stops.
- The main application counter starts again.
- The appearances of play and pause icons return to normal.

12.6. Completion while session is paused
If there is an active pause while the session is being completed, the system first ends the pause and then continues the session completion operation.
Active pause duration is subtracted when total application duration is calculated.